Editing your Form
Forms allow you to customize the experience your prospects and customers will have and what information you collect from them so it's important to configure them to best serve your business and customers.
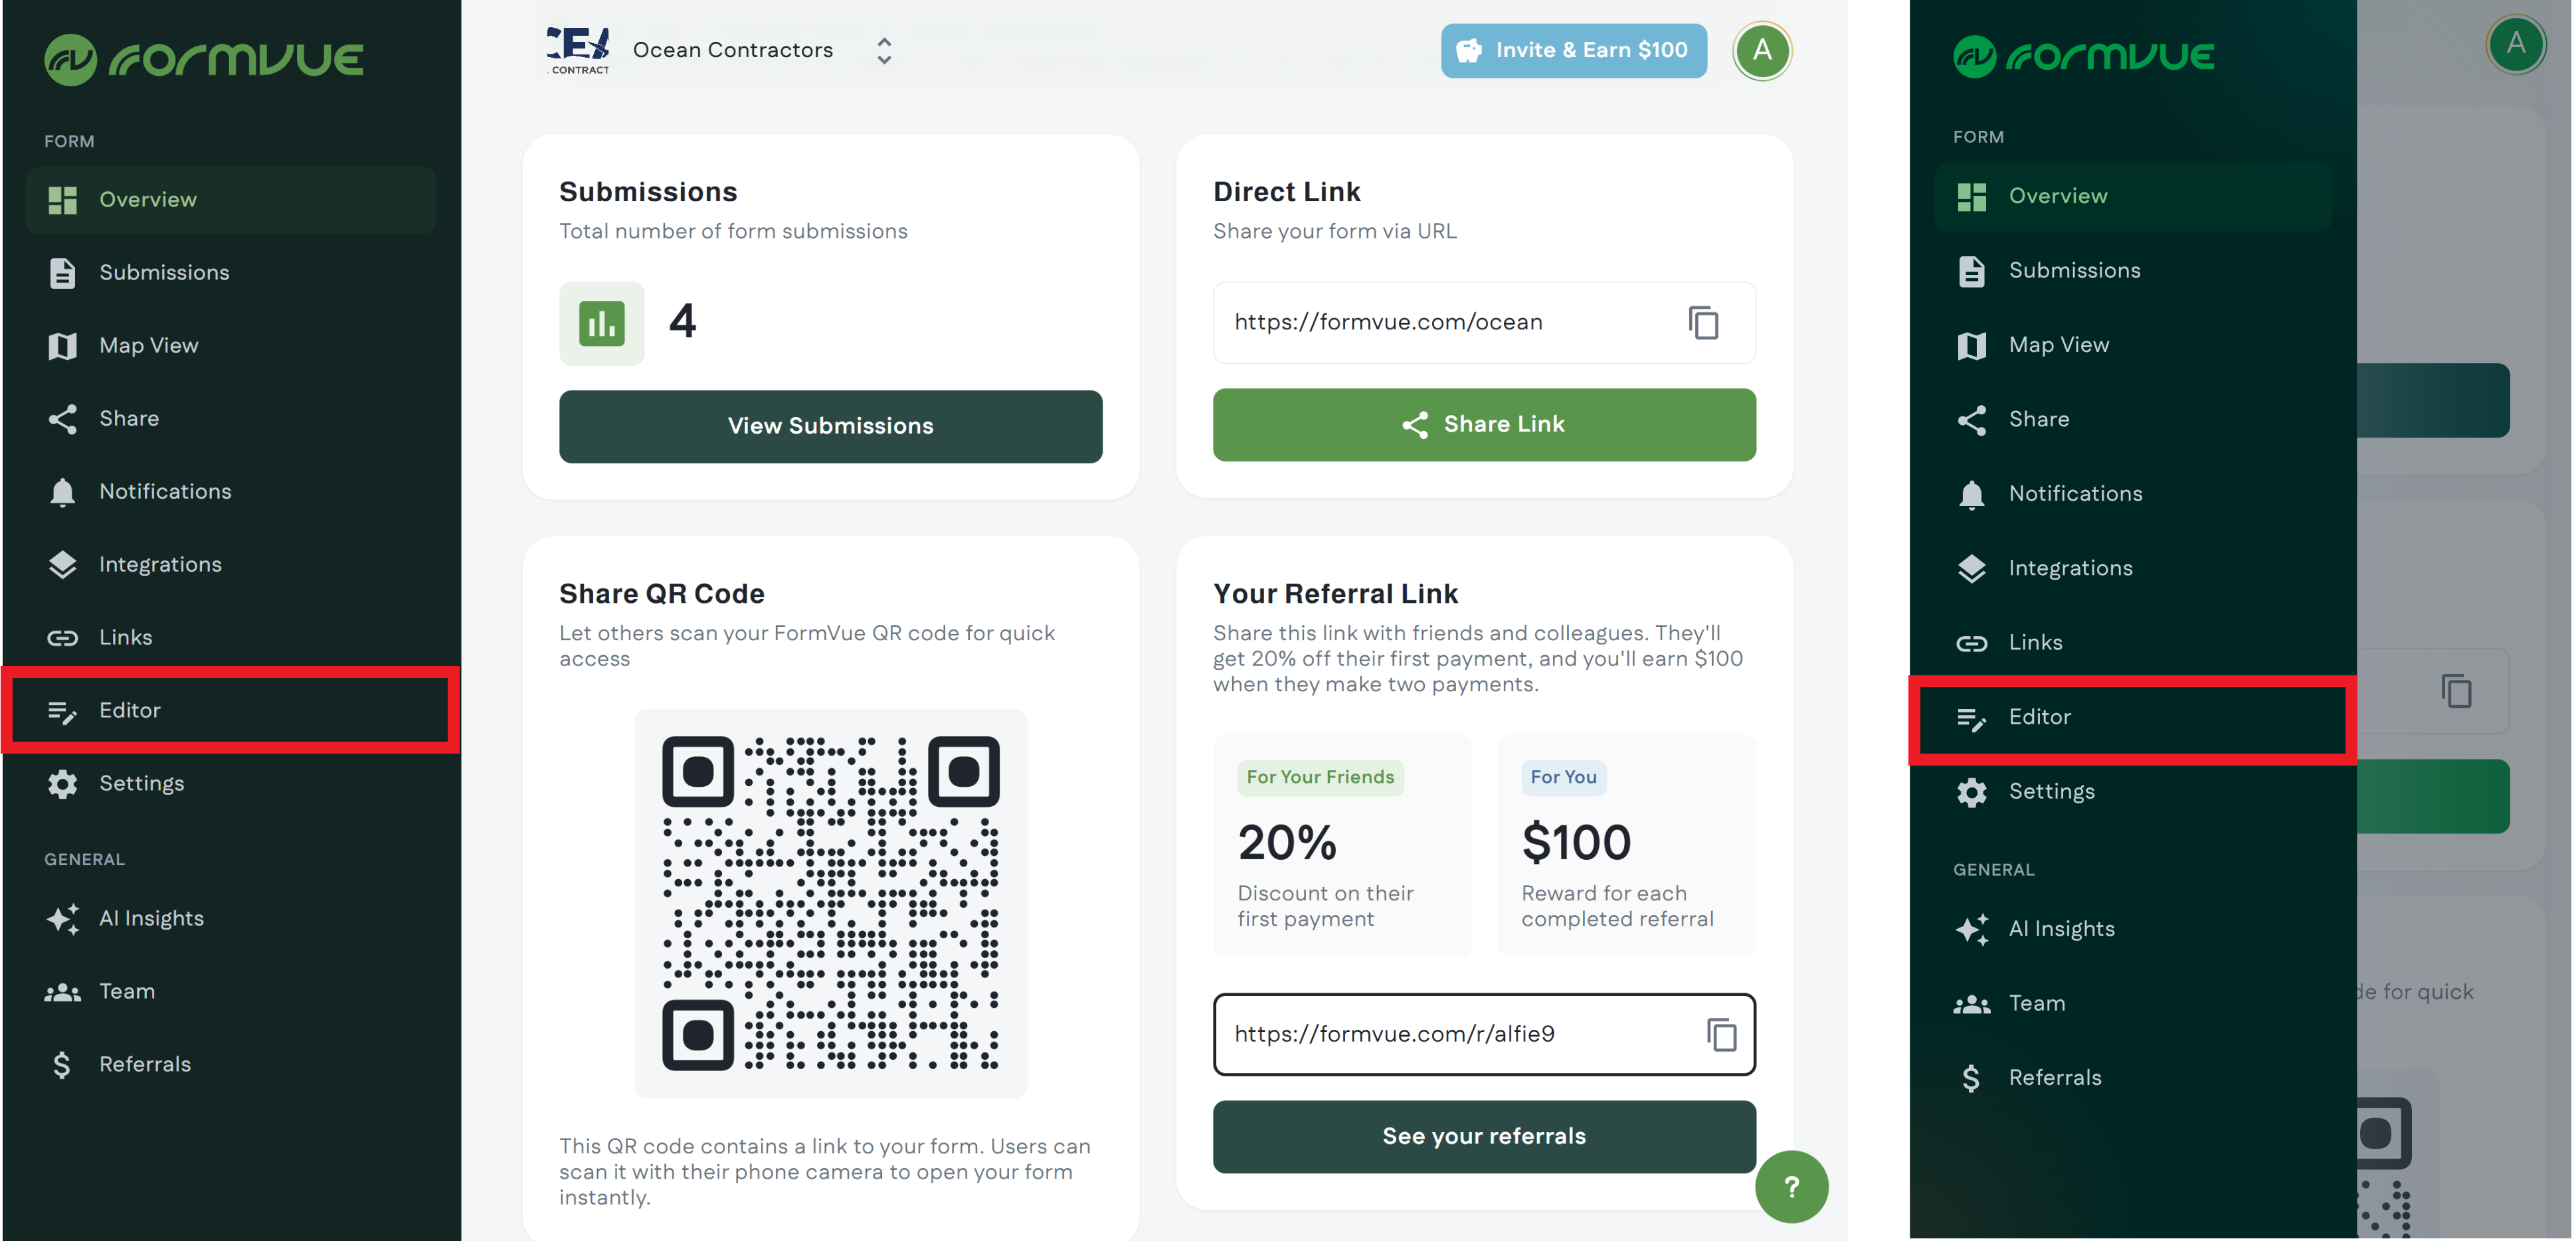
Step 1. Navigate to the Forms page
Log into FormVue and navigate to the Editor.
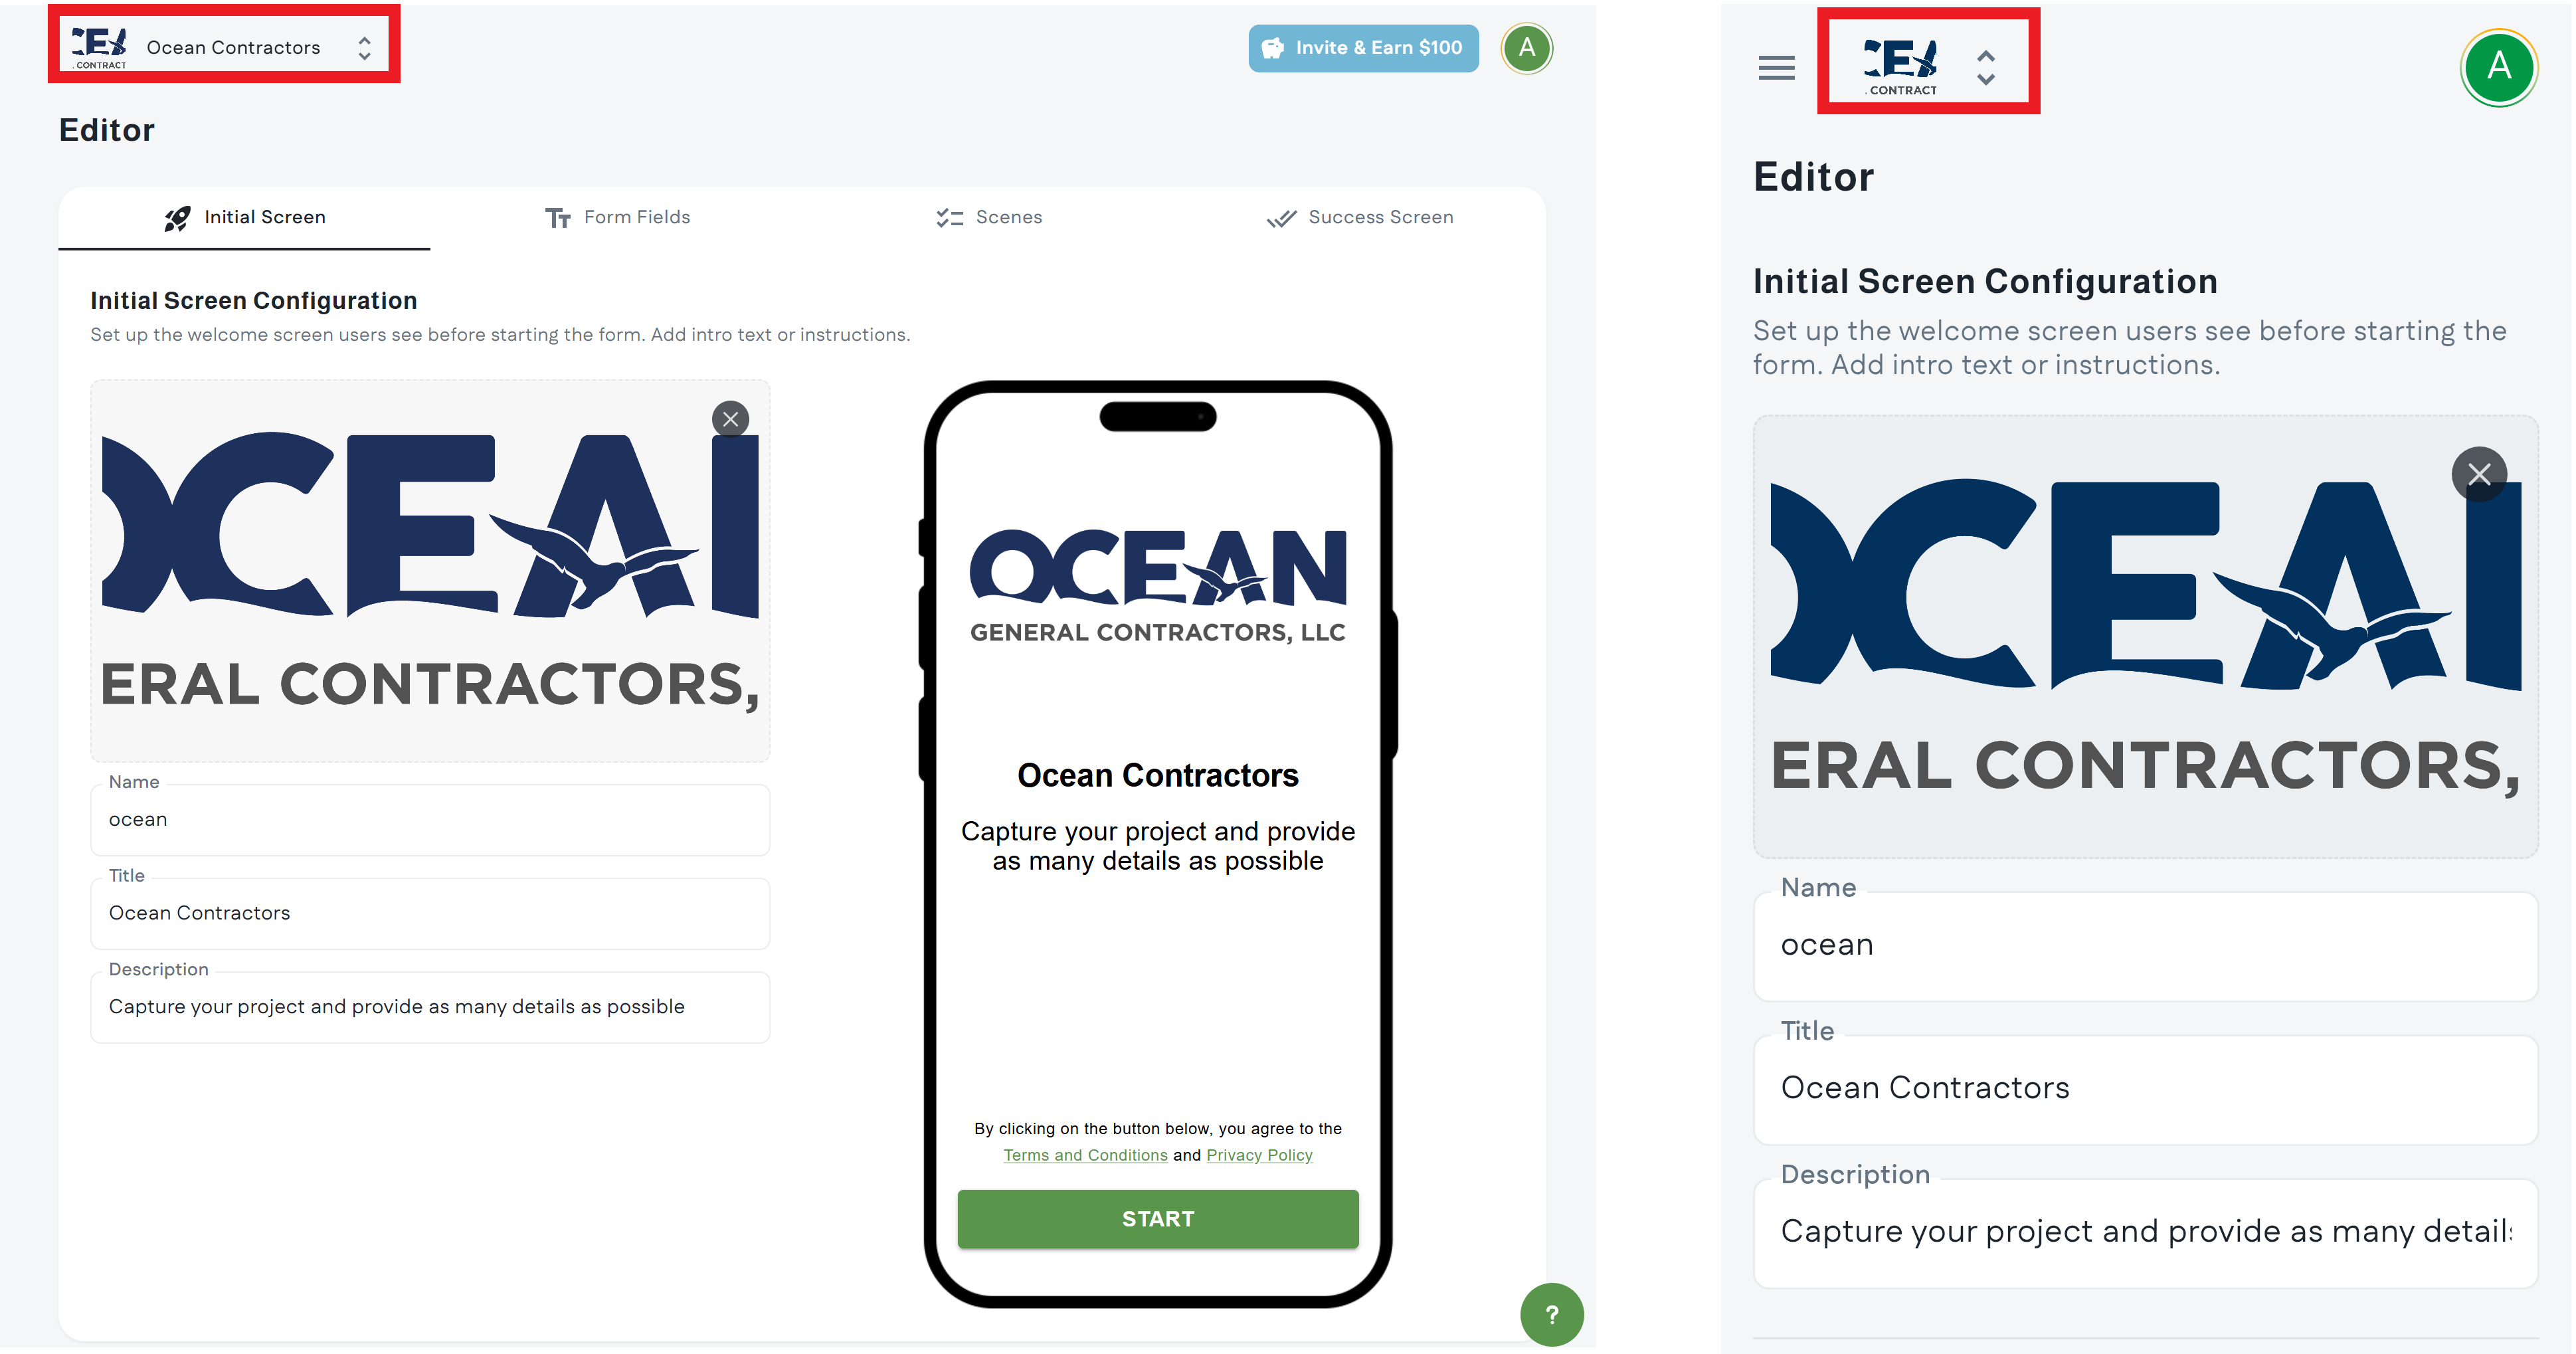
Step 2: Select your form (optional)
If you have multiple forms, select the form you want to edit from the drop down at the top of the page
Step 3: Edit your form
Use the form editor to configure your form. Changes made in the form editor are saved automatically.
You will see your updates reflected in real time in the preview area.
Initial Screen
This is the screen your customers and prospects will see when you use your form link.
- Logo: upload your company logo
- Name: the name of your form (NOTE: this will impact your form link)
- Title: the title of your form, which will appear in bold
- Description: a description of what you want your users to capture in their video submission
The form name dictates the URL or link that your prospects and customers will use to submit videos, so it's important to keep it short and simple. Your company or service name is a good example.
Remember that you can have multiple forms and may want to name them accordingly. For example, if your company, Ocean General Contractors, provides Plumbing, Heating, and Electrical services, you may want a different form for each service, each with their own form name: /oceanplumbing, /oceanheating, /oceanelectrical.
Form Fields
After your prospect records their video, you can ask them to provide additional information, such as contact information, budget, email address, etc.
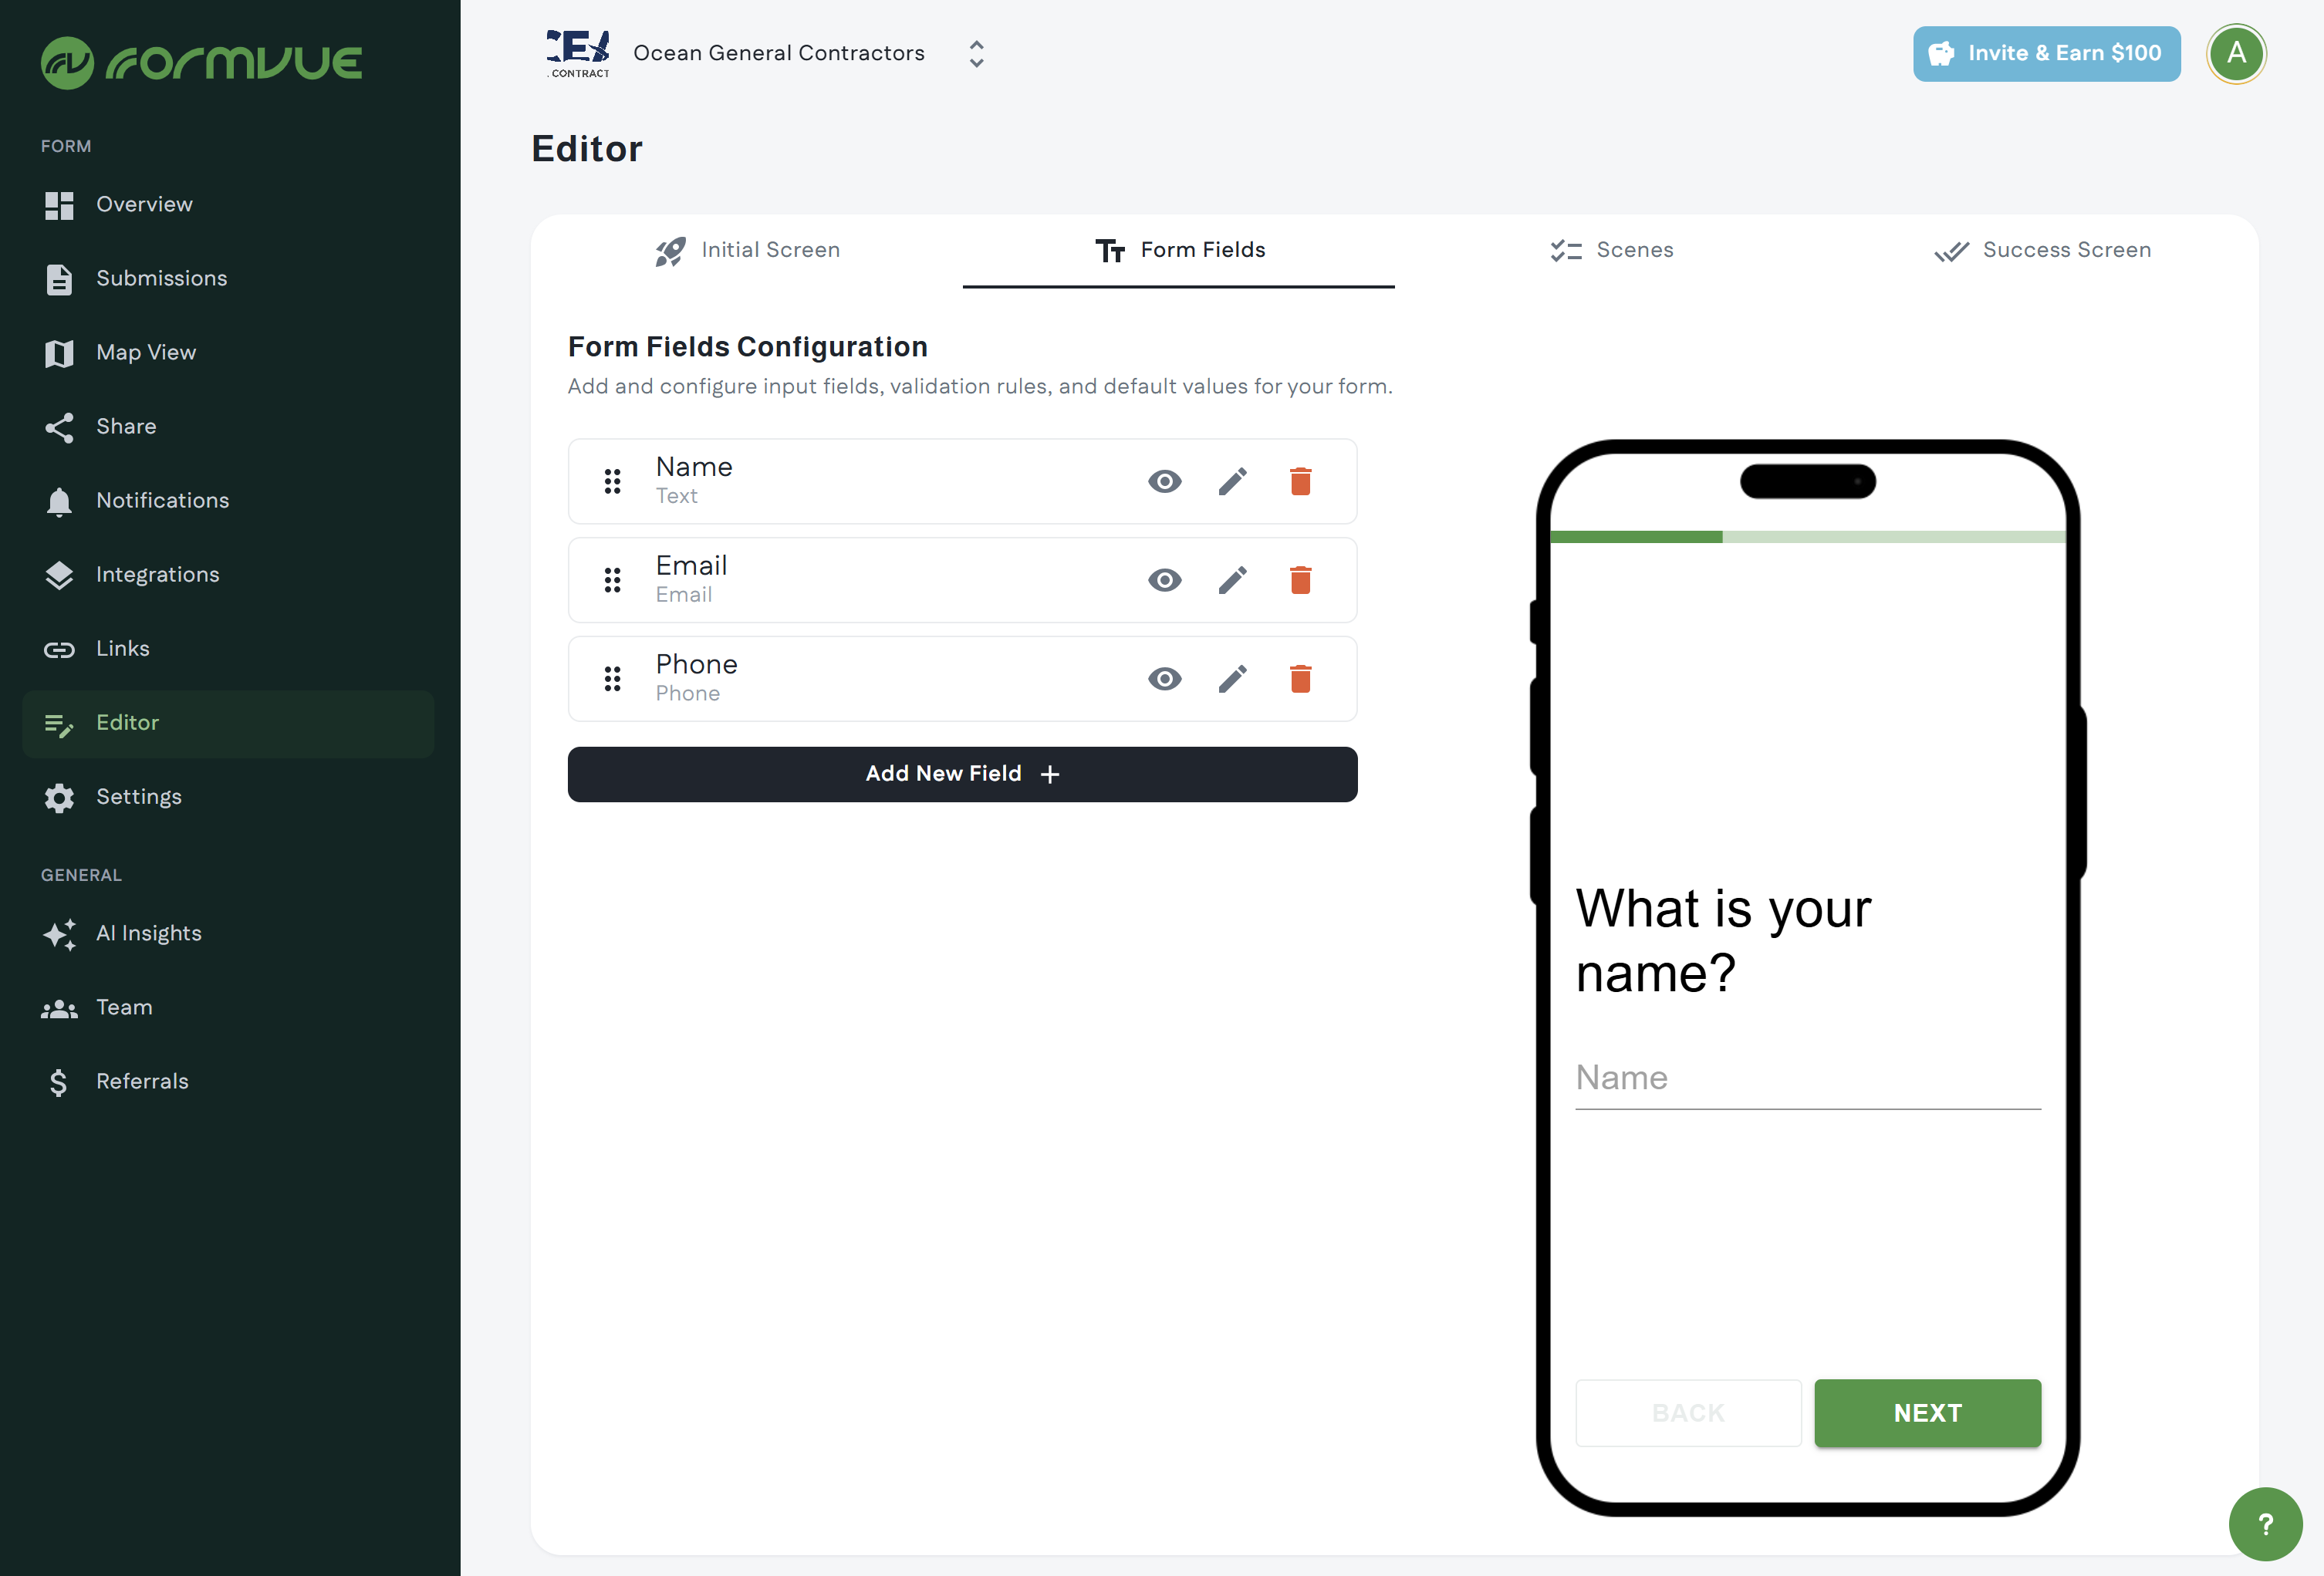
Each form comes pre-configured with a few recommended fields, but you can add, delete, and edit form fields to suit your needs using the buttons next to each field.
 | Preview the form field in the editor preview area |
 | Edit the form field |
 | Delete the form field |
Use the Add New Field + button to add new field.
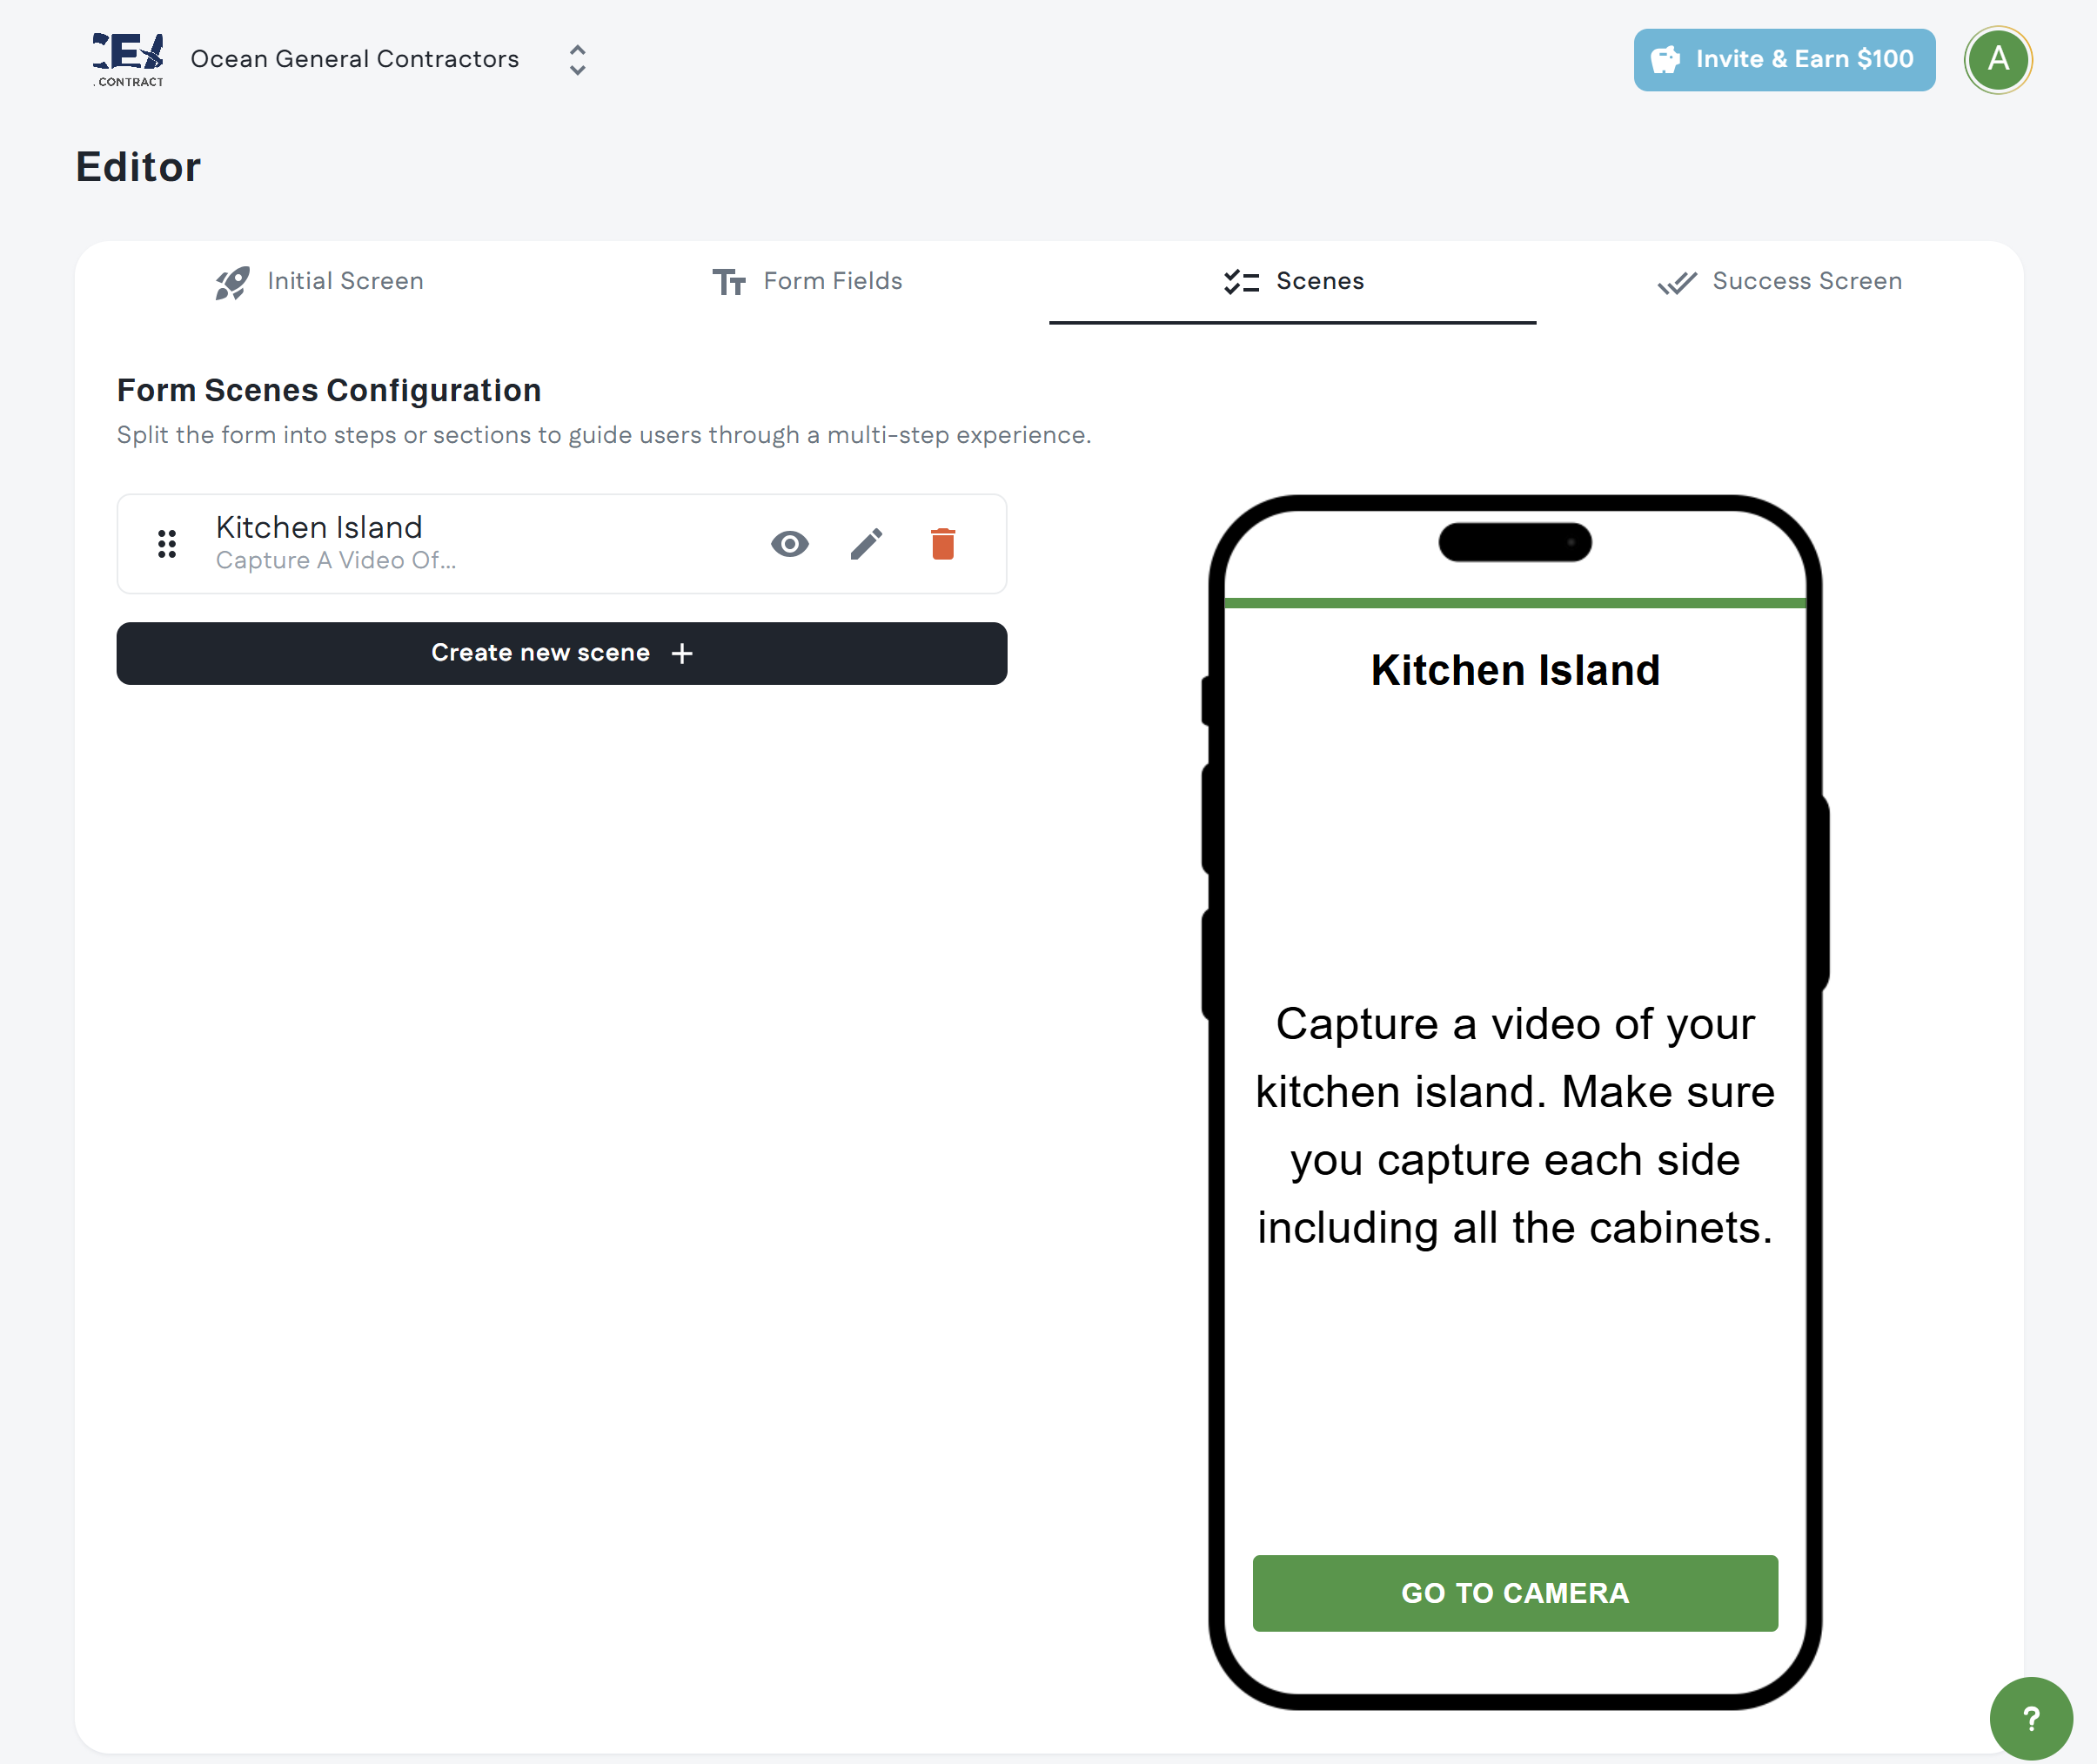
Scenes
Scenes allow your customers to capture multiple in the same submission. Scenes are great when your want your customer to capture separate distinct areas.
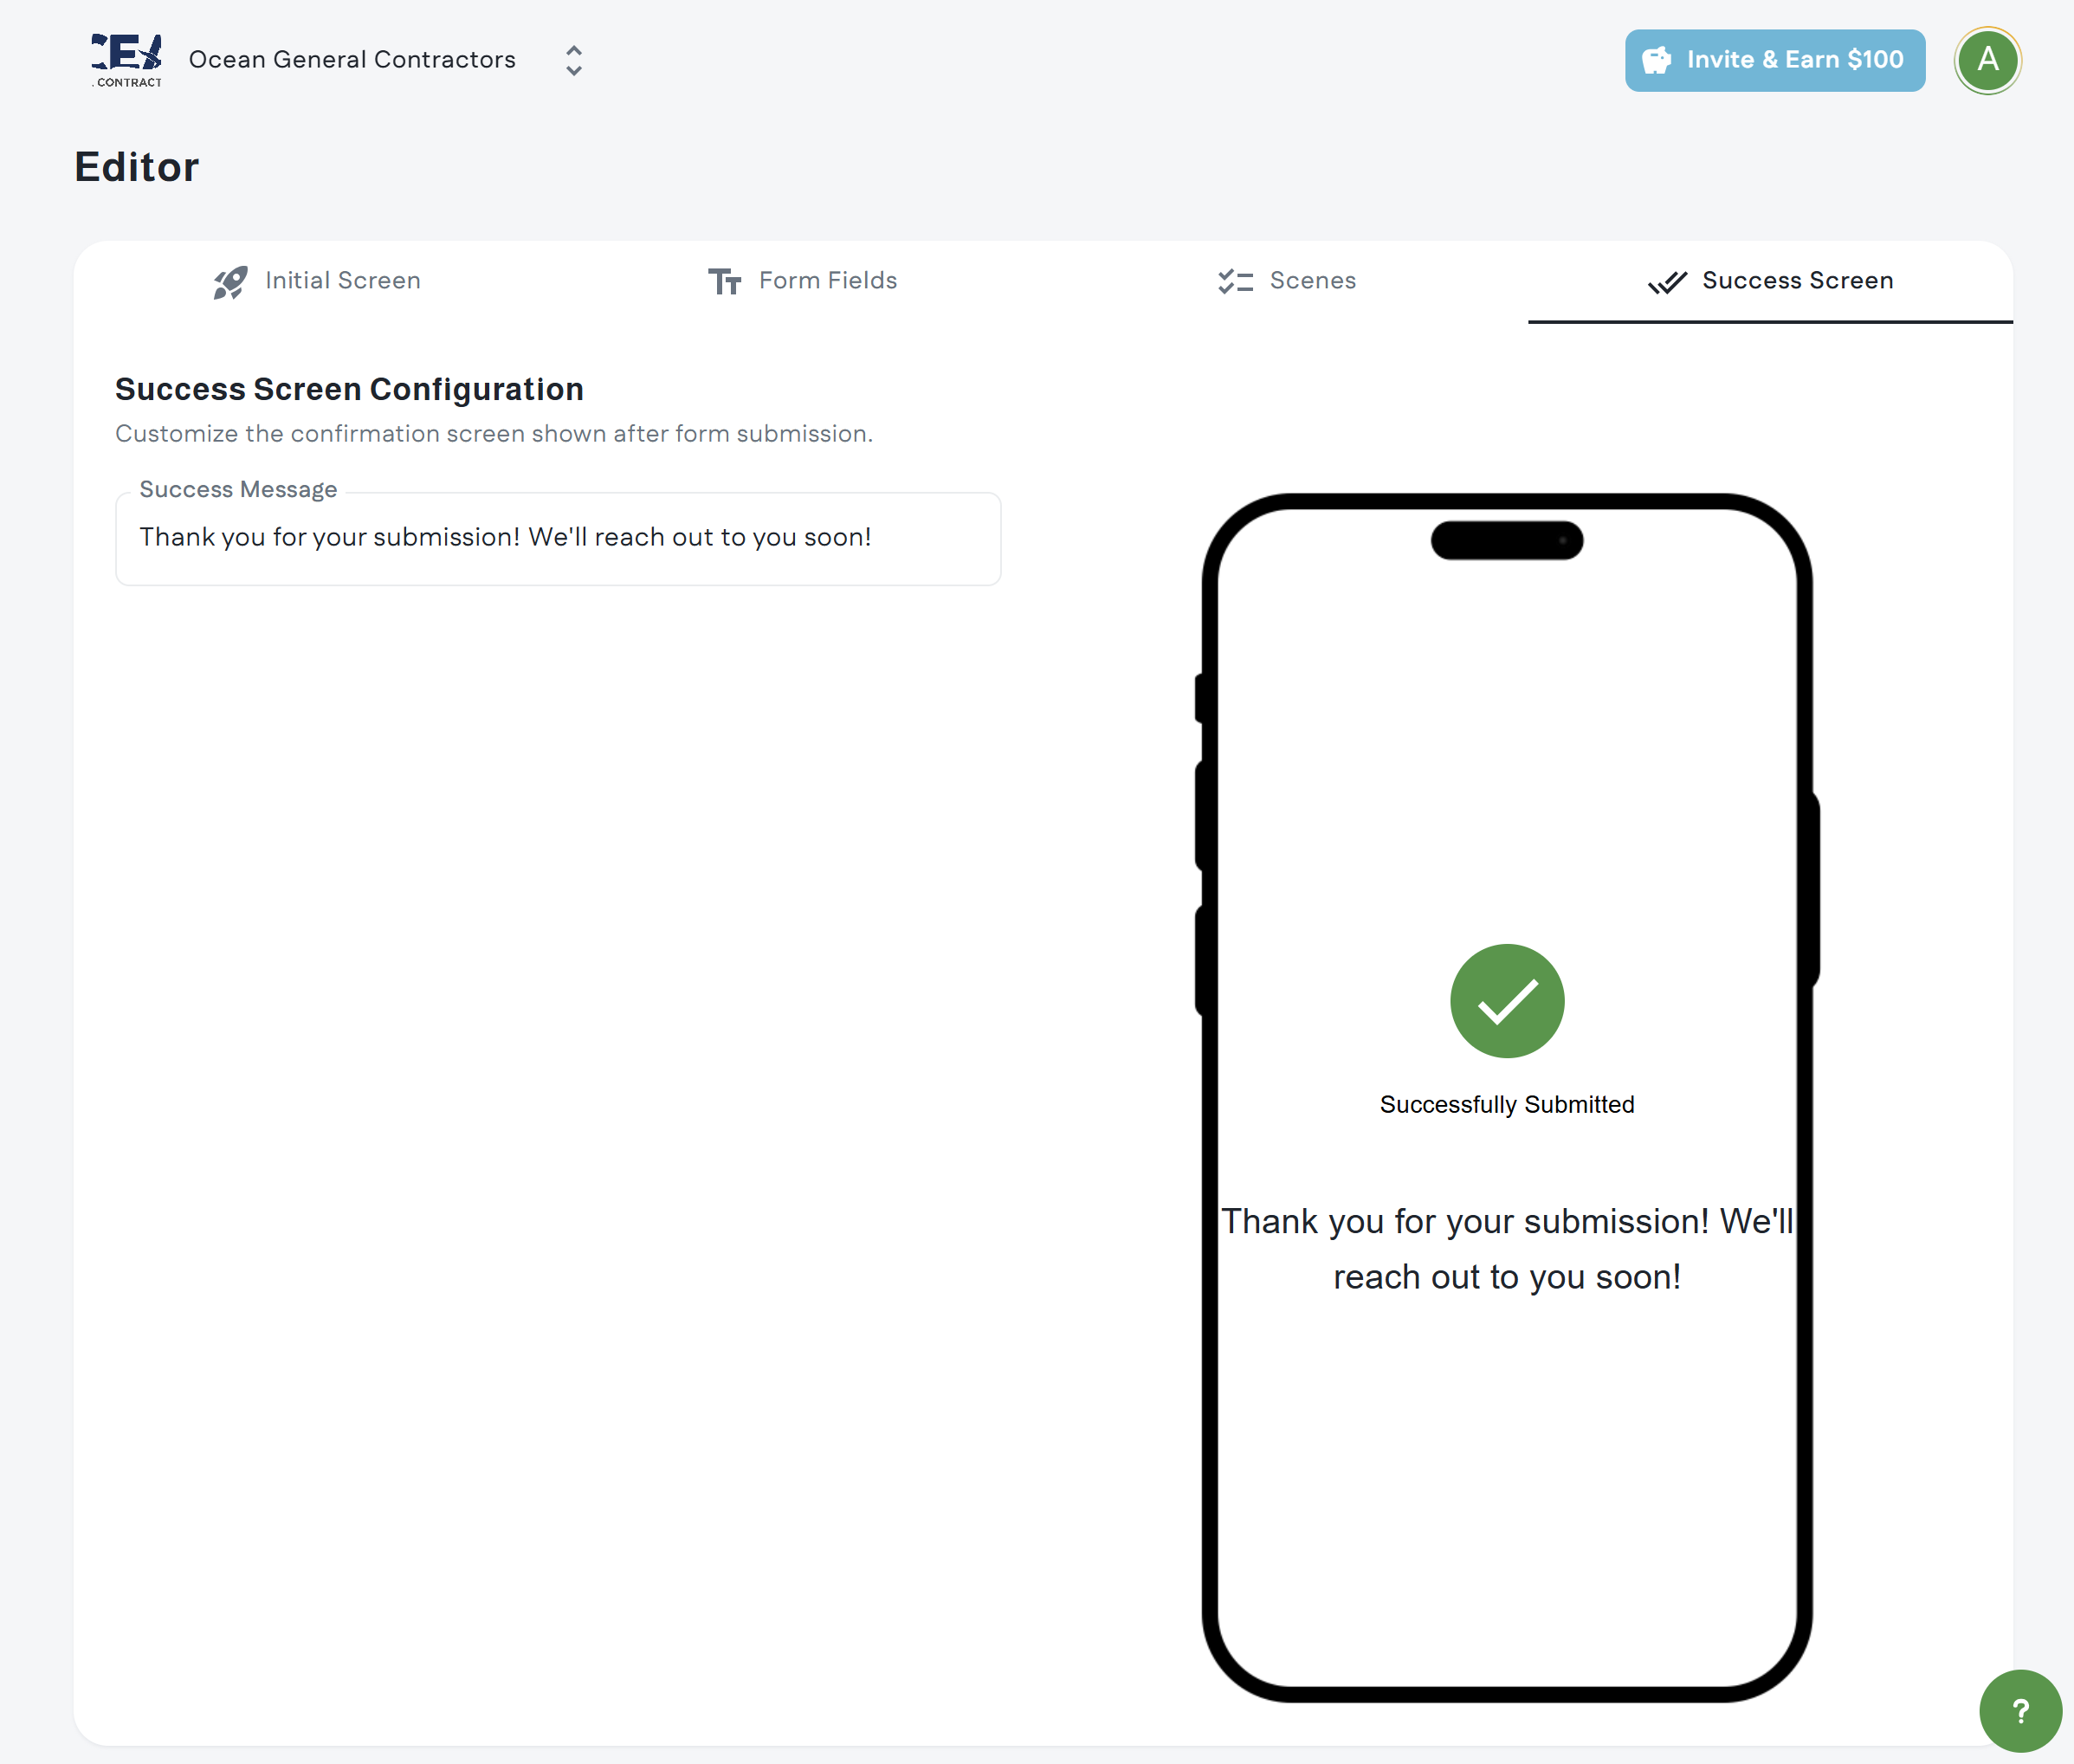
 Success Message
The success message is displayed after the user completes the form submission. You can add a custom message here thanking them for their submission and let them know what the next steps are, such as when they should expect to hear back from you.
Once you configure the success message, click Create Your Form to complete the form creation process.